Let’s setup Zimbra 9.0.0 on Ubuntu 18.0.4 and configure letsencrypt SSL certificates on it

Author : Chandan Pawar
Zimbra Collaboration Suite (ZCS) is an open source and free for personal use, collaborative software platform. It is used for emails, calendaring, tasks and more. ZCS can be deployed either on premises or private and public clouds easily. Since, we have direct control over ZCS, the data is completely safe and secure.
Zimbra provides Mobile-enabled browsers and mobile apps, so you can collaborate anywhere, from any device. ZCS will easily fit into your existing solutions and infrastructure and quickly add additional functionality via Open APIs. You can use ZCS in small, medium-size enterprises to very large organisations.
ZCS is currently developed and maintained by https://www.zimbra.com/.
Having your own email server is a great idea for any medium-sized company. With this, all the traffic is controlled and we can define the rules ourselves. This way we can manage the service clearly and cleanly.
In this article, I will show you how to install and set up an Zimbra on Ubuntu 18.04 and then we will secure the installation with letsencrypt SSL certificates.
Install Zimbra Collaboration Suite In Ubuntu 18.04
In this tutorial, we will see how to install Zimbra Collaboration Suite in Debian based systems, for example Ubuntu 18.04.
System Requirements
- OS: Ubuntu 18.04 64bit
- We are using IP: 23.227.167.159 to install Zimbra and we are using a sub-domain webmail.postbox.services to install Zimbra so we would be able to send/receive emails from [email protected]
- Zimbra Server’s FQDN: webmail.postbox.services
- Zimbra Server’s IP address: The IP address of the VPS we are using is 23.227.167.159
- DNS Server’s IP address: 23.227.167.1
Recommended Hardware Requirements:
You need to have at least the following configurations to deploy ZCS.
- Intel/AMD 64-bit CPU 1.5 GHz
- 8 GB or more RAM
- 10GB HDD minimum
- Additional disk space for mail storage
- Fast Internet connection
Setup initial DNS records
Setup the required A and MX records.
A record :

MX record :

Now we are going to start ZCS installation on ubuntu 18.04
Update your system and install the necessary dependencies for Zimbra:
First make sure your system and the packages are up to date. Update your Ubuntu system using command:
sudo apt-get update && sudo apt-get upgrade
Network Configuration: This is very important to update the system host name and IP address. Run the command
sudo vi /etc/hosts
Add your Zimbra server’s IP address and hostname as shown below. Replace the following lines with your own values.
23.227.167.159 webmail.postbox.services webmail
Download and install Zimbra Collaboration Suite:
Important: Please note that its recommended to install ZCS on a fresh system . You cannot have any other web server, database, LDAP, or MTA server running, when you install the Zimbra software. If you have installed any of these applications before you install Zimbra software, disable those applications. During the Zimbra Collaboration installation, Zimbra makes global system changes that may break applications that are on your server.
Download the zimbra with following command :
#cd /opt
#wget -c https://files.zimbra.com/downloads/9.0.0_GA/zcs-NETWORK-9.0.0_GA_3924.UBUNTU18_64.20200331010312.tgz
#tar -zxvf zcs-NETWORK-9.0.0_GA_3924.UBUNTU18_64.20200331010312.tgz
#cd zcs-9.0.0_GA_1.UBUNTU18_64.20200416221446
#./install.sh
Now Zimbra will ask for confirmation on what all components need to be installed. Press Y or N to begin.
– Do you agree with the terms of the software license agreement? [N] y
– Use Zimbra’s package repository [Y] y
And so on
Select the packages to install
Install zimbra-ldap [Y] y
Install zimbra-logger [Y] y
Install zimbra-mta [Y] y
Install zimbra-dnscache [Y] N
Install zimbra-snmp [Y] y
Install zimbra-store [Y] y
Install zimbra-apache [Y] y
Install zimbra-spell [Y] y
Install zimbra-memcached [Y] y
Install zimbra-proxy [Y] y
Install zimbra-drive [Y] y
Install zimbra-imapd (BETA – for evaluation only) [N] N
Install zimbra-chat [Y] y
Checking required space for zimbra-core
Checking space for zimbra-store
Checking required packages for zimbra-store
zimbra-store package check complete.
Now Zimbra starts installing
Installing:
zimbra-core
zimbra-ldap
zimbra-logger
zimbra-mta
zimbra-snmp
zimbra-store
zimbra-apache
zimbra-spell
zimbra-memcached
zimbra-proxy
zimbra-drive
Zimbra-patch
zimbra-mta-patch
zimbra-proxy-patch
zimbra-chat
The system will be modified. Continue? [N] y
Type Y if asked The system will be modified. Continue?
Press ‘6’ and press enter to change the password of the admin account.
Type again 4 and then press enter. Enter your password. Like:
Main menu
1) Common Configuration:
2) zimbra-ldap: Enabled
3) zimbra-logger: Enabled
4) zimbra-mta: Enabled
5) zimbra-snmp: Enabled
6) zimbra-store: Enabled
+Create Admin User: yes
+Admin user to create: [email protected]
* +Admin Password UNSET
+Anti-virus quarantine user: [email protected]
… skip …
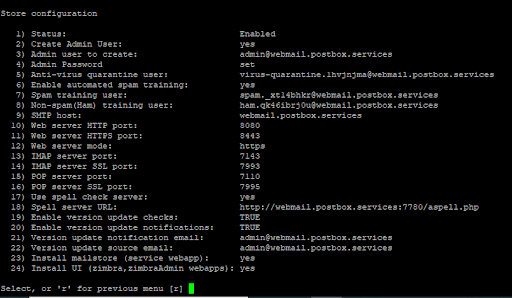
Address unconfigured (**) items (? – help) 6
Store configuration
1) Status: Enabled
2) Create Admin User: yes
3) Admin user to create: [email protected]
** 4) Admin Password UNSET
5) Anti-virus quarantine user: [email protected]
… skip …
Select, or ‘r’ for previous menu [r] 4
Password for [email protected] (min 6 characters): [oosdf98jmnv] hjGgjhxxKPassword for [email protected] (min 6 characters): [oosdf98jmnv] hjGgjhxxK
After entering the password, Select a to apply or r for the previous menu. If all has been configured, apply configuration and wait until Zimbra installation finished
*** CONFIGURATION COMPLETE – press ‘a’ to apply
Select from menu, or press ‘a’ to apply config (? – help) a
Save configuration data to a file? [Yes] Yes
Save config in file: [/opt/zimbra/config.1450] press key enter
Saving config in /opt/zimbra/config.1450…done.
The system will be modified – continue? [No] Yes
Operations logged to /tmp/zmsetup.20200619-013402.log
You have the option of notifying Zimbra of your installation.
This helps us to track the uptake of the Zimbra Collaboration Server.
The only information that will be transmitted is:
The VERSION of zcs installed (9.0.0_GA_1_UBUNTU18_64)
The ADMIN EMAIL ADDRESS created ([email protected])
Notify Zimbra of your installation? [Yes] Yes
Notification complete
Checking if the NG started running…done.
Setting up zimbra crontab…done.
Moving /tmp/zmsetup.20200619-013402.log to /opt/zimbra/log
Configuration complete – press return to exit
Final configuration :
Check Zimbra status with this command su – zimbra -c “zmcontrol status” and make sure all service running well.
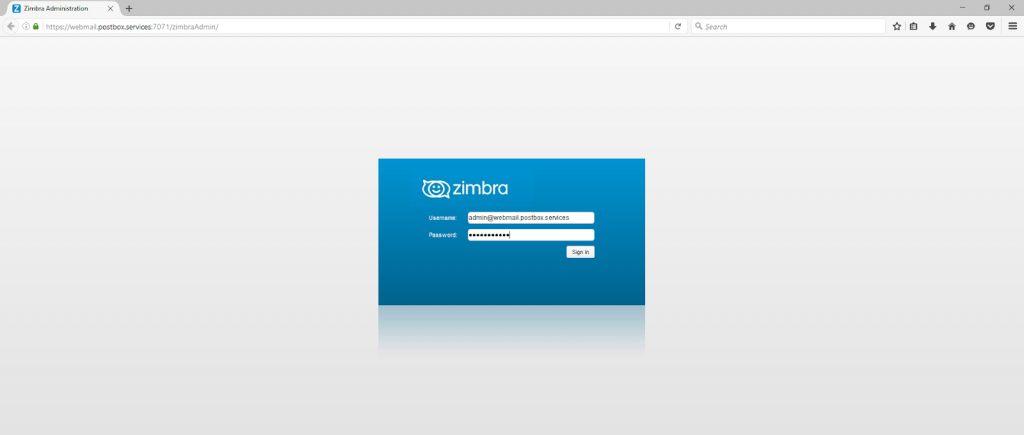
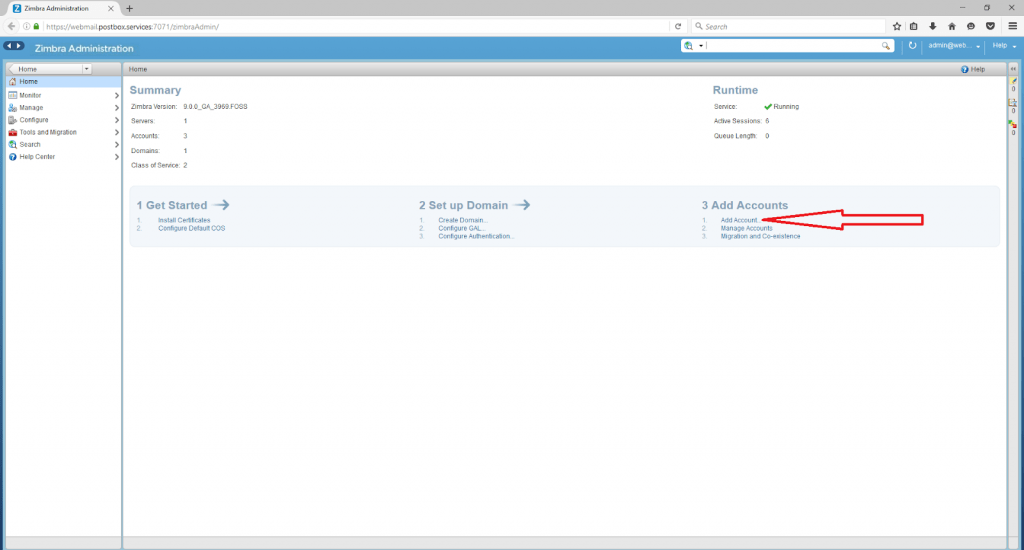
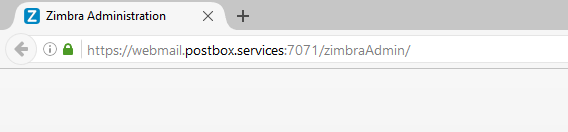
Access Zimbra Admin Web console
Open up your web browser and type: https://domain-name:7071 in the address bar.
Enter the user name as ‘admin’ and the admin password which you have setup in the above steps.
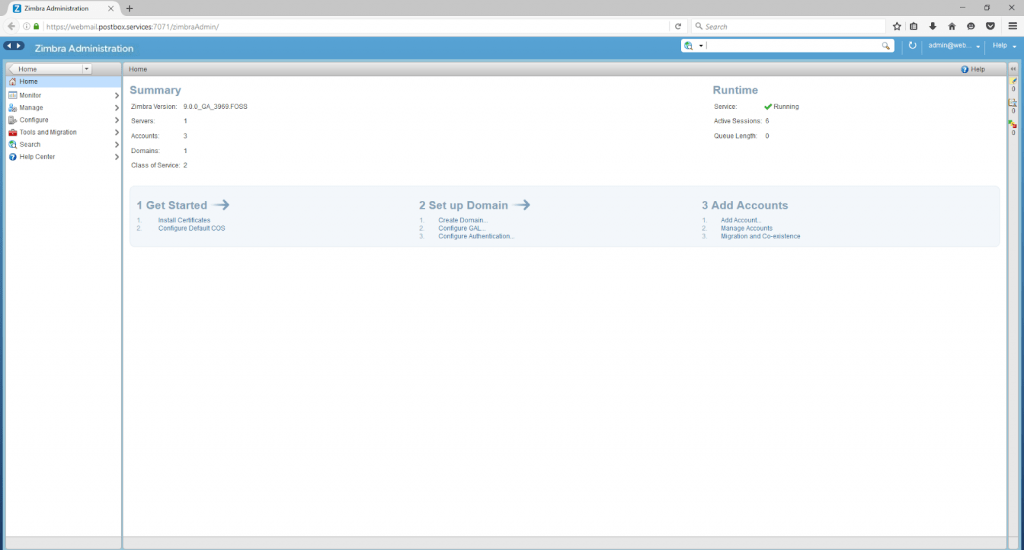
This is how zimbra’s Dashboard looks.
On the dashboard click on Add Account menu to add new accounts and Below Add account Manage Account option you can change any configration of the added accounts.
After clicking the Add account menu there is a window which have black boxes fill all the required information and click on Finish option below. As shown in the below pic:
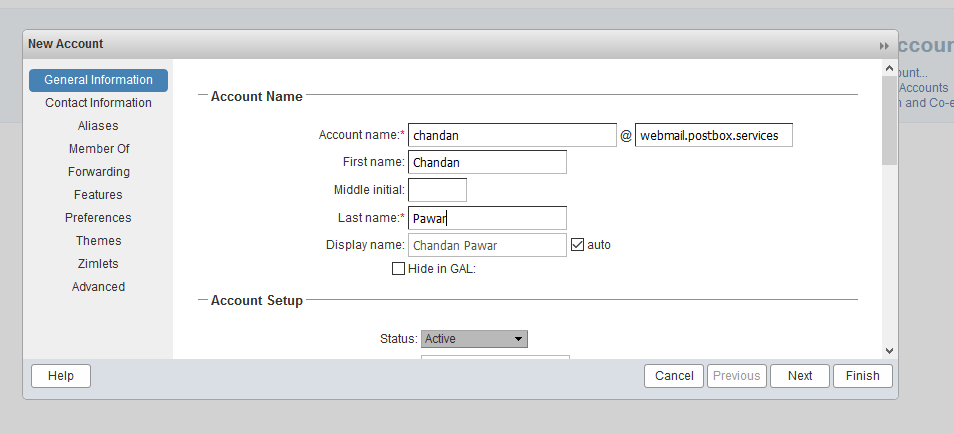
Here we created a new user by name chandan. Similarly, we can create, edit, delete users, mail-ids, domains and also other kind administration tasks such as monitoring users, setup Quotas for Users etc.
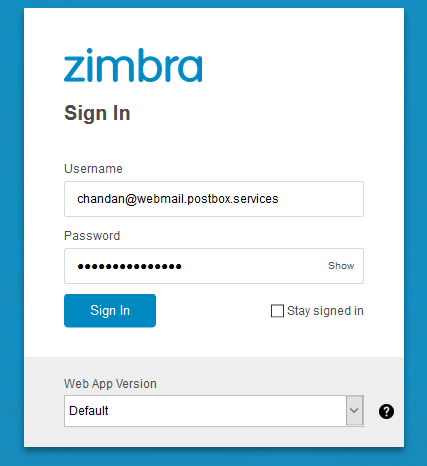
Access Zimbra User’s Web console
The users can access their mails using this console.
Type: http://domain-name/ in the address bar. Log in with a valid username and password which we have created in the Zimbra Admin console.

User login console : In Login console enter User ID and password.
User Dashboard :

Let us compose a sample Email to the admin user.
Click on the New Message on the top left corner.
Enter the recipient , subject, and body of the mail. Finally, hit the Send. Check from the recipient account if you have got the email.
Let’s encrypt SSL installation
At first Zimbra was not secured by https :
This guide will show you how to easily secure your Zimbra Mail Server with Let’s Encrypt SSL certificate. The default installation of Zimbra generates a self-signed SSL certificate for Mails services – POP3/IMAP/SMTP over TLS and for HTTPS access to Zimbra console services.
Let’s start encrypt installation steps :
Step 1: Install certbot-auto tool
We will use the certbot-auto tool to request for Let’s Encrypt SSL Certificates. The tool is not installed by default on your system but can easily be downloaded and installed.
# wget https://dl.eff.org/certbot-auto
make the script executable.
# chmod +x certbot-auto
Move the script to the directory in your PATH.
# sudo mv certbot-auto /usr/local/bin
Step 2: Stop Zimbra Proxy Service
We need to stop the jetty or nginx service before we can configure it to use Let’s Encrypt SSL certificate.

Step 3: Obtain Let’s Encrypt SSL Certificate
Once the Zimbra proxy and mailboxd services are stopped we can proceed to request for Let’s Encrypt in auto mode. Sure you pass all the hostnames used by your Mail Server.
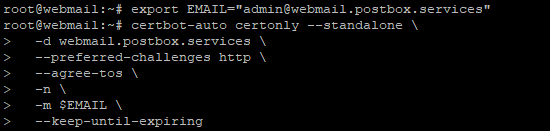
#export EMAIL=”[email protected]”
# certbot-auto certonly --standalone -d webmail.postbox.services --preferred-challenges http --agree-tos -n -m $EMAIL --keep-until-expiring
When you run the commands you’ll see output like below.
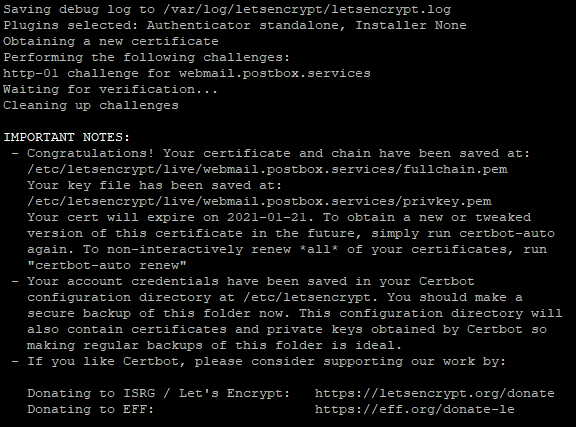
You can find all your files under /etc/letsencrypt/live/$domain
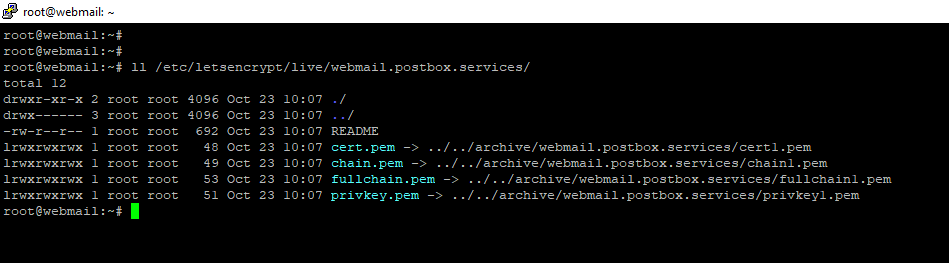
cert.pem: The actual certificate file
chain.pem: The chain file
fullchain.pem: Concatenation of cert.pem + chain.pem
privkey.pem: Private key
Step 4: Secure Zimbra Mail Server with Let’s Encrypt SSL Certificate
Create a directory that will hold Let’s Encrypt certificates for Zimbra Server.
# sudo mkdir /opt/zimbra/ssl/letsencrypt

Copy Certificate files.
# CERTPATH=”/etc/letsencrypt/live/webmail.postbox.services
# sudo cp $CERTPATH/* /opt/zimbra/ssl/letsencrypt/
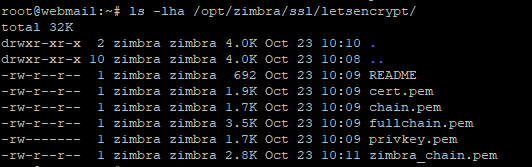
Confirm files are copied successfully.
$ ls /opt/zimbra/ssl/letsencrypt/
cert.pem chain.pem fullchain.pem privkey.pem README
Now we have to build a proper Intermediate CA plus Root CA. You must use the IdenTrust root Certificate and merge it after the chain.pem.
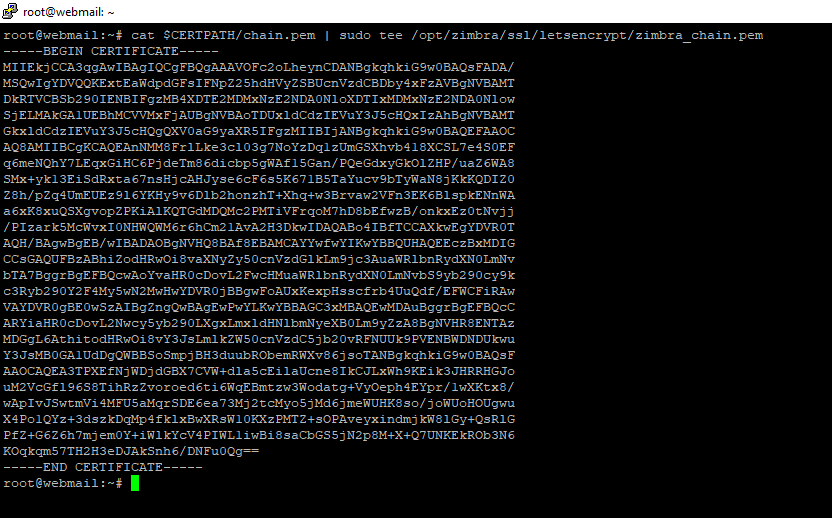
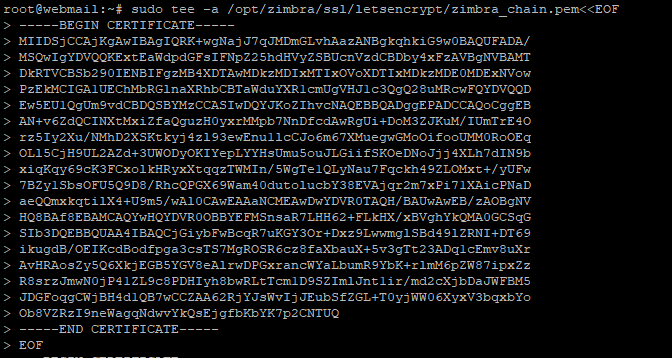
# cat $CERTPATH/chain.pem | sudo tee /opt/zimbra/ssl/letsencrypt/zimbra_chain.pem
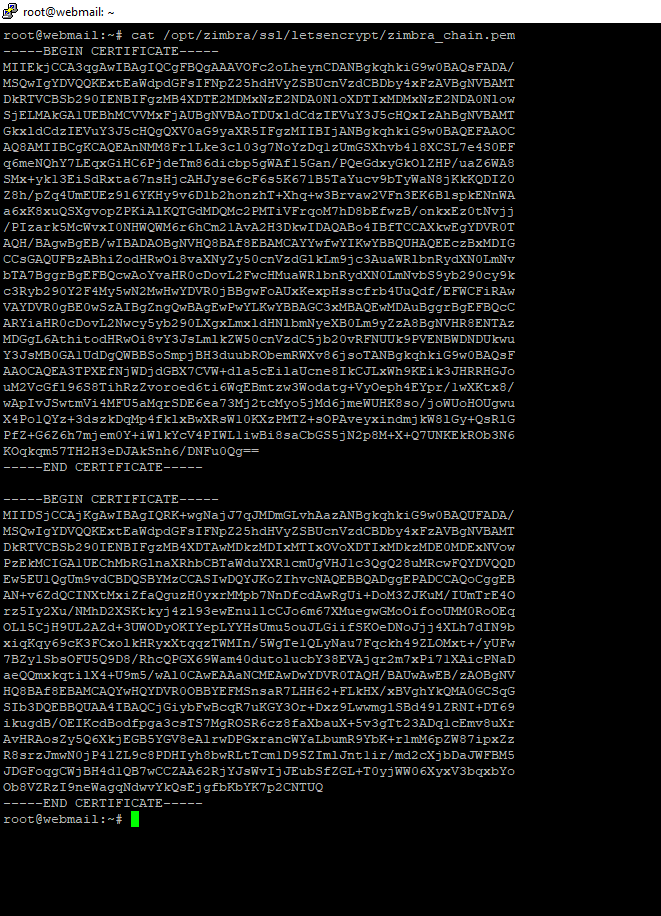
View the file contents:
Combine the chain.pem with the root CA – Order is chain before the root CA.
Confirm the resulting file:
Set correct permissions for the directory:
# sudo chown -R zimbra:zimbra /opt/zimbra/ssl/letsencrypt/
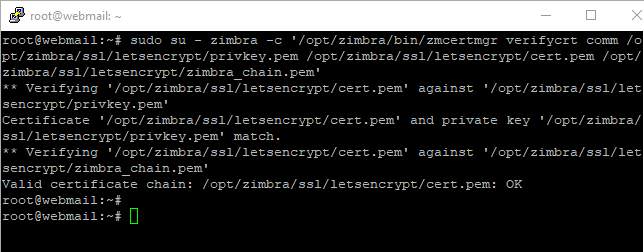
Verify your commercial certificate.
# sudo su – zimbra -c ‘/opt/zimbra/bin/zmcertmgr verifycrt comm /opt/zimbra/ssl/letsencrypt/privkey.pem /opt/zimbra/ssl/letsencrypt/cert.pem /opt/zimbra/ssl/letsencrypt/zimbra_chain.pem’
Output should not give any errors or mismatch.
Backup current certificate files.
# sudo cp -a /opt/zimbra/ssl/zimbra /opt/zimbra/ssl/zimbra.$(date “+%Y%.m%.d-%H.%M”)
Copy the private key under Zimbra SSL path.
#sudo cp /opt/zimbra/ssl/letsencrypt/privkey.pem /opt/zimbra/ssl/zimbra/commercial/commercial.key
# sudo chown zimbra:zimbra /opt/zimbra/ssl/zimbra/commercial/commercial.key
Finally deploy the new Let’s Encrypt SSL certificate.
# sudo su – zimbra -c ‘/opt/zimbra/bin/zmcertmgr deploycrt comm /opt/zimbra/ssl/letsencrypt/cert.pem /opt/zimbra/ssl/letsencrypt/zimbra_chain.pem’
My certificate deployment output is as shown below.
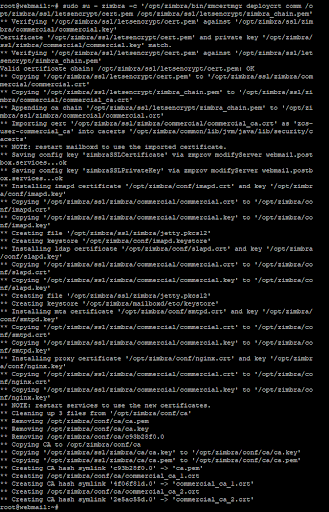
Restart the nginx or jetty services stopped earlier.
# sudo su – zimbra -c “zmcontrol restart”
Now we have completed the installation for let’s encrypt.
How to add second / new domain in Zimbra :
Step :1 Login Administrator dashboard
Login admin dashboard via admin credentials

Step : 2 Enter your Domain name

In this General Information, you enter a new domain in the Domain name box (eg: tgbconsultinggroup.com) and enter the domain mail in the Public service host name box (eg: webmail.tgbconsultinggroup.com).
The Public service protocol section has two values: HTTP and HTTPS, you can choose HTTPS.
Note : Replace domain name with your domain name.
In the Public port section, you enter the port corresponding to the above protocol, 80 for HTTP and 443 for HTTPS.
What does this part mean? If you do not declare this Public service section, Zimbra will use the default service port to public to the user. Services such as changing passwords, for example, you may experience a service error of port 8443.
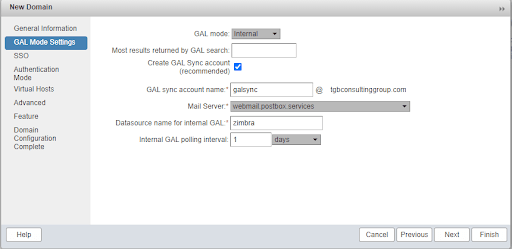
Step : 3 Enter your GAL information
This section to create a GAL account, you only need to select your server in the Mail Server section, you can default the rest. You can read more about the GAL here.
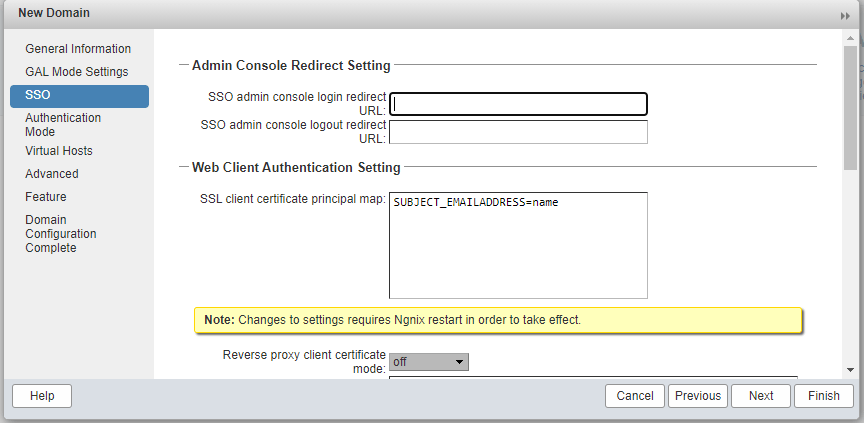
Step 4: Set up SSO for domain mail
If you use SSO systems like CAS Server, you can enter the URL information in this section.
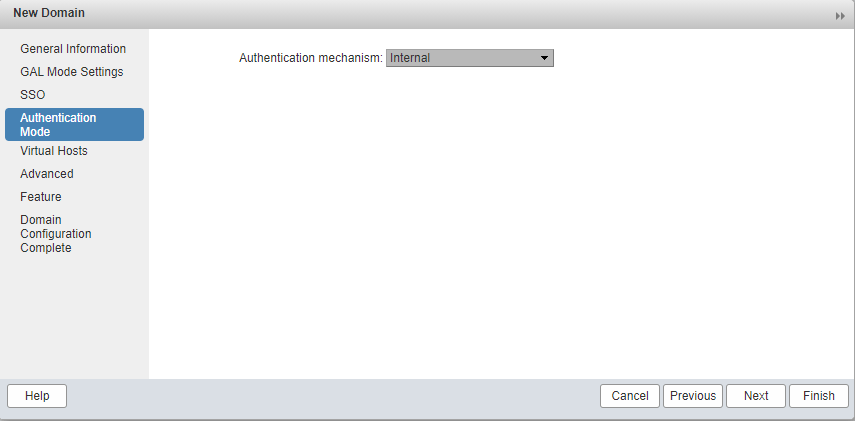
Step 5: Set up authentication mode
Authentication mode, I leave the default to use Internal because I run a single server.
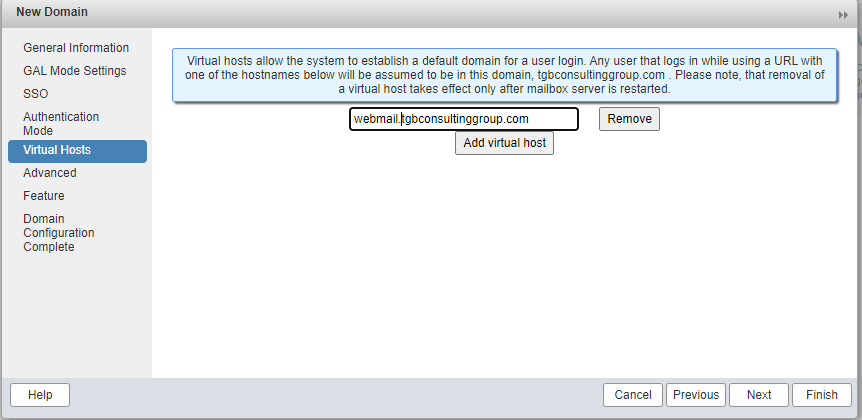
Step 6: Set up virtual host for new domain mail
This part is quite interesting, if you use gmail, you notice that when you enter a username, you don’t have to type @gmail.com.
Creating a virtual host for the Zimbra system mail domains, allows corresponding mail domains (eg mail.yourdomain.com), the user only needs to enter username, for example: ella (not including @yourdomain.com).
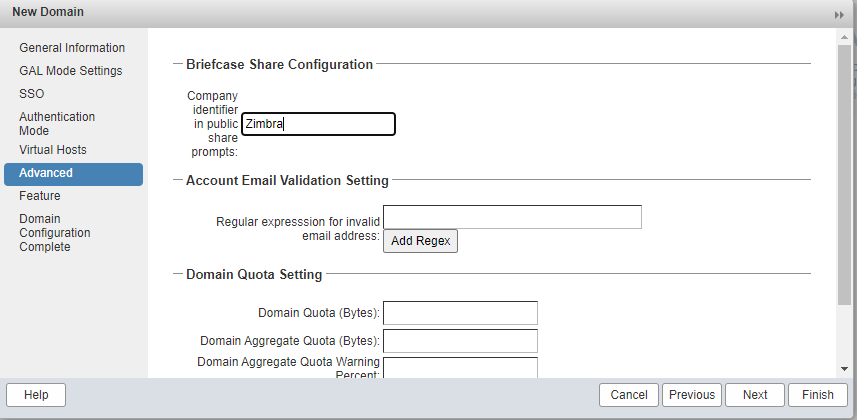
Step 7: Set up advanced CoS for new domains
In the Advanced section, you can leave the default COS initially when installing Zimbra. Or you can optionally edit the parameters. When creating new mail accounts, these parameters will be applied to users.
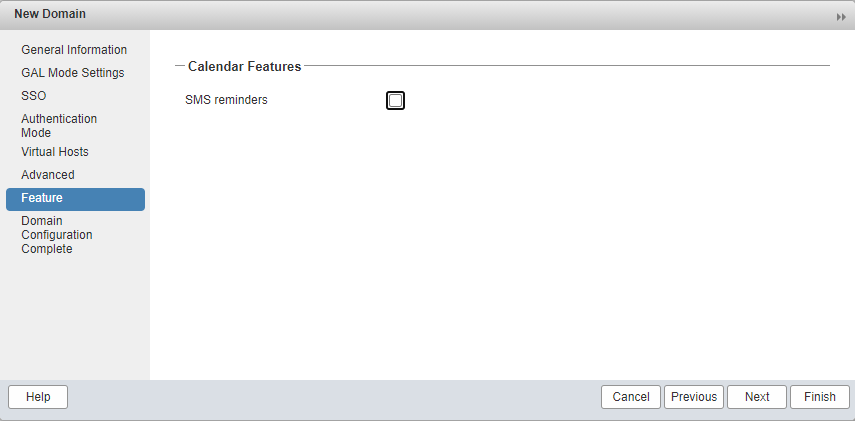
Step 8: Select enable SMS reminders feature
Step 9: Complete the addition of the domain
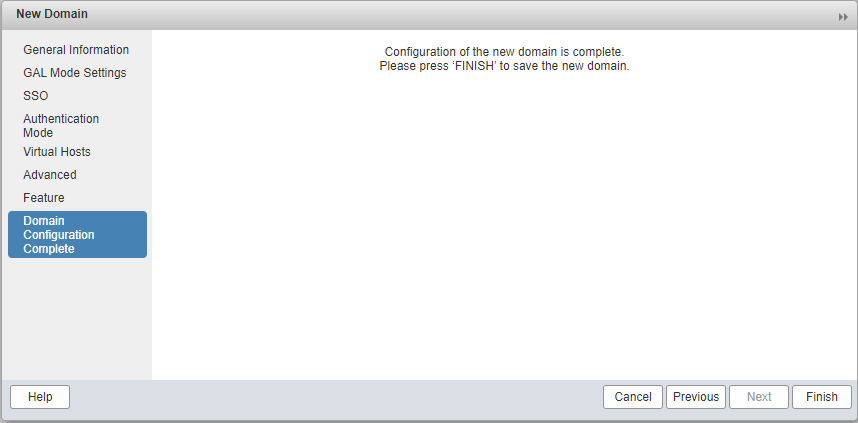
Now click the finish button. Domain added successfully. You can add new domain with another method.
Your Zimbra installation is completed and ready to use.