How to set up a catch-all for your subdomain using Google Workspace
Author: Saurabh Saxena
Introduction
A catch-all email is an email address that collects all the emails sent to your domain (or subdomain) but are sent to non existing email addresses. And for various reasons you may be looking to setup catch-all on one or many of your subdomains. This blog has detailed instructions.
Email marketers often use subdomains for all of their marketing and promotional emails. Subdomains can be configured with any ESP (email service provider) to send email marketing campaigns. For example I may decide to send all of my newsletters from [email protected] using Mailchimp. Hope you noticed that email address is [email protected] and not [email protected].
If you wonder why should marketing or promotional emails be sent from a subdomain these two blogs give very good insights:
Promotional email vs. transactional email: Why it’s important to separate the two
Using Email Subdomains Like A Pro
So I will go ahead and configure my subdomain on Mailchimp and will be ready to start sending email campaigns from [email protected]. But what in case someone replies back to this email? And even to configure the email [email protected] on the ESP, ESP may send a verification email. So we should be able to receive replies to this address.
I can obviously create the email address [email protected] on Google workspace, but in case I need to have several of such email addresses on several subdomains and at the same time I do not expect many replies back then I can set up catch-all on my subdomains using Google workspace instead of creating paid accounts.
Let’s see how to do that.
Step 1: Setup the MX records for the subdomain
First things first – any incoming email to the subdomain newsletters.postboxservices.com should be routed to Google servers. So I will set up my MX records. Instructions to setup MX records are given by Google here.
Only difference is the first column where instead of parent domain you need to give subdomain, MX records will look like this in our example:
| Name/Host/Alias | Time to Live (TTL*) | Record Type | Priority | Value/Answer/Destination |
|---|---|---|---|---|
| newsletters | 3600 | MX | 1 | ASPMX.L.GOOGLE.COM |
| newsletters | 3600 | MX | 5 | ALT1.ASPMX.L.GOOGLE.COM |
| newsletters | 3600 | MX | 5 | ALT2.ASPMX.L.GOOGLE.COM |
| newsletters | 3600 | MX | 10 | ALT3.ASPMX.L.GOOGLE.COM |
| newsletters | 3600 | MX | 10 | ALT4.ASPMX.L.GOOGLE.COM |
Step 2: Change the routing and setup catch-all
- Sign in to your Google Admin console. Sign in using your administrator account (does not end in @gmail.com).
- From the Admin console Home page, go to Apps
Google Workspace
Gmail
Default routing.
- Under Default routing, click Configure
- Under “Specify envelope recipients to match” from drop down select “Pattern match” and in Regexp give the subdomain for which you need to setup catch-all. In current case it looks like this:
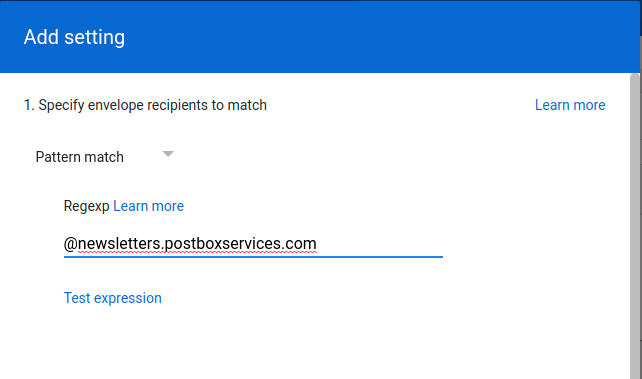
5. Under “2. If the envelope recipient matches the above, do the following” go to “envelop recipient” click on “Replace recipient” and give the email address which need to receive all emails for the domain newsletters.postboxservices.com
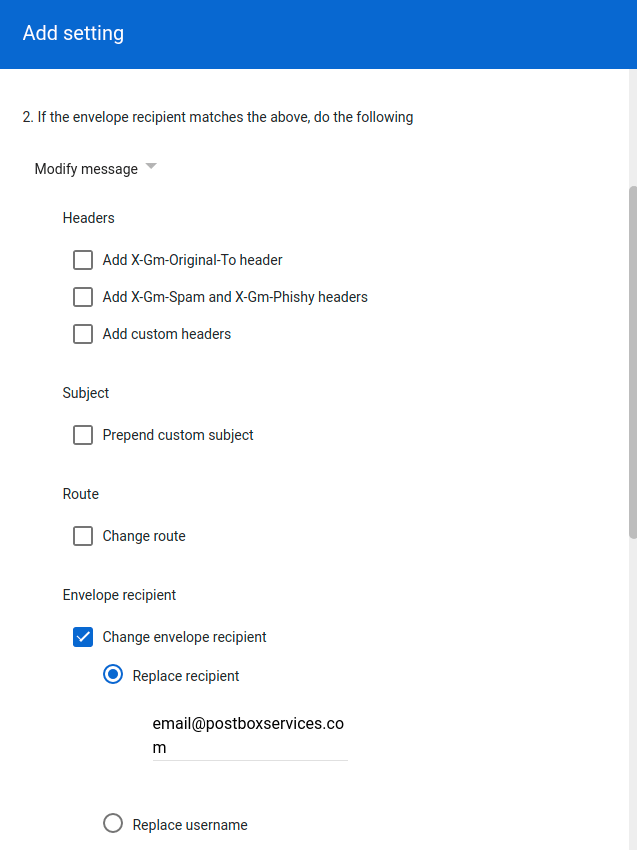
6. Scroll down and opt for “Bypass spam filter for this message” and “Perform this action only on non-recognized addresses”
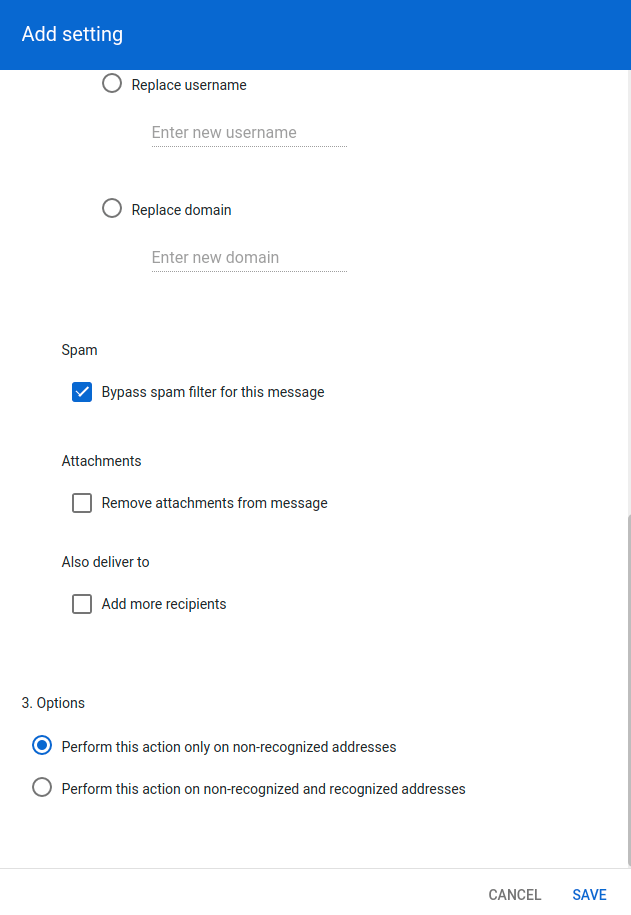
7. Save the form and you are good to go. Now let’s try to send some email to the subdomain which we have setup.
8. Let’s send an email to [email protected]
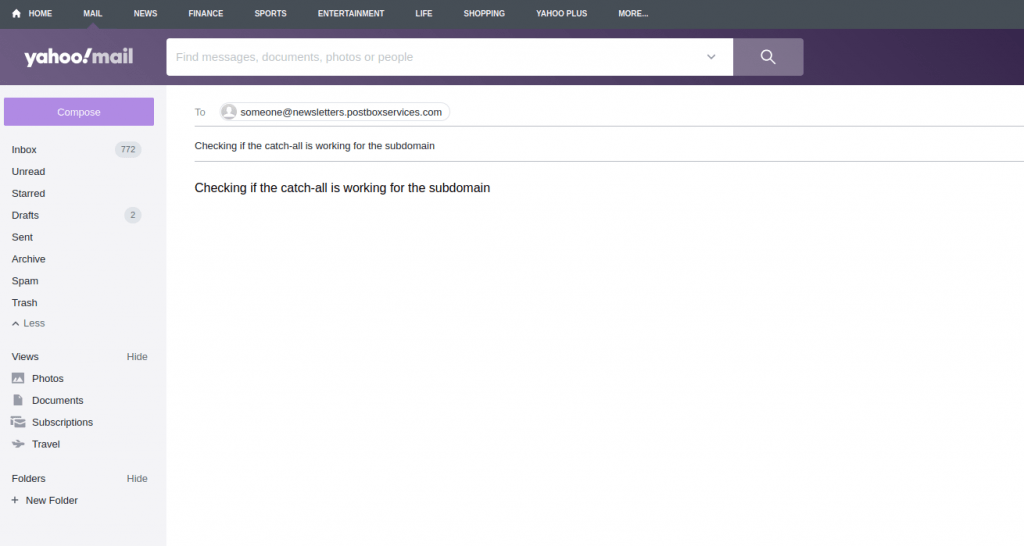
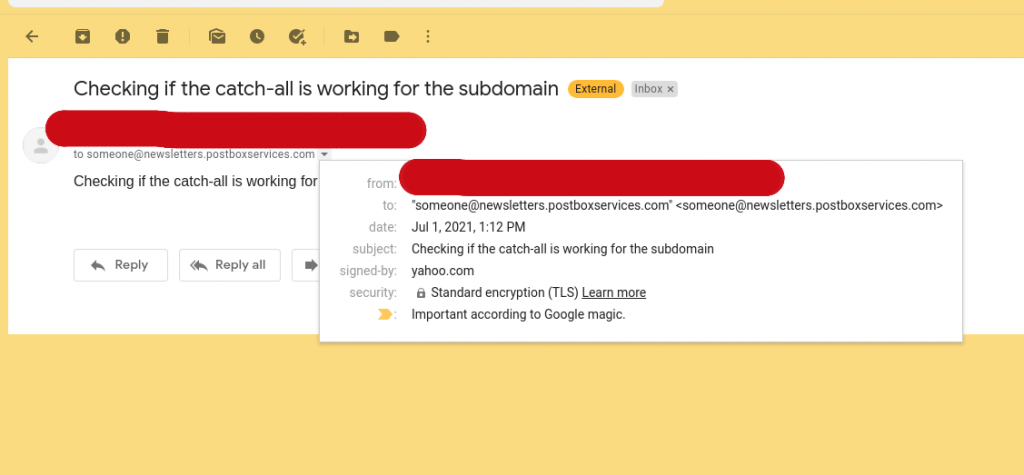
9. Wow… I received the email at the expected email address and here is the screenshot:
10. This is just one scenario but you may explore Google workspace routing to implement different use cases.


