Mailwizz Installation steps on Ubuntu 18.04
Introduction
Mailwizz is a fully-featured self-hosted email marketing application. Mailwizz license can be purchased from Codecanyon. This article explains the process of Mailwizz (email marketing application) installation on a Ubuntu VPS. Mailwizz can be used to run email marketing campaigns using multiple ESPs at same time. For example you can integrate Mailwizz with Sendgrid, Mailgun and PMTA at same time and a single campaign can go out from all three email streams. It has many quite unique features which an email marketer can use to improve deliverability and scale his email campaigns.
You can use it as a SAAS application and run your own email marketing company and charge your customers. It can be integrated with few payment gateways. You can create different monthly plans for your customers and can decide from backend which customer’s email campaigns go out from which email delivery servers.
System Requirement
When installing Mailwizz, the hardware (VPS) requirements are as following:
Linux Operating System
Apache Web Server – version 2.x
PHP>=7.0 (php>=7.2 for high delivery speed)
MySQL (>=5.1) or MariaDB
Linux Cron Jobs access (not web crons)
You can purchase your VPS from Digital Ocean here or can host your VPS with any provider of your choice.
Let’s start the setup
Open the VPS terminal with root ID
Step 1: Change the hostname of the Ubuntu system:
The procedure to change the hostname on Ubuntu Linux:
- Type the following command to edit /etc/hostname using nano or vi text editor:
sudo vim /etc/hostname
Delete the old name and set up a new name. - Next Edit the /etc/hosts file:
sudo vim /etc/hosts
From: 127.0.0.1 old-host-name To: Your-IP new-server-name-here - Replace any occurrence of the existing computer name with your new one.
- Reboot the system to changes take effect by the command :
sudo reboot
Step 2: Update Local Ubuntu Repositories. The add-apt-repository command is not a regular package that can be installed with apt on Debian / Ubuntu LTS
sudo apt-get install software-properties-common

Step 3: Adding the PPA to your system:
sudo add-apt-repository ppa:ondrej/php

Step 4 Update your server to the latest version:
sudo apt-get update

The sudo apt-get update command is used to download package information from all configured sources.
Step 5. Now run :
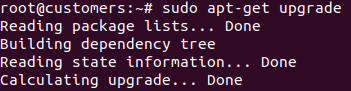
sudo apt-get upgrade
Step 6. PHP 7.2 stable version has been released. Use the following set of commands to enable PPA for PHP 7.2 in your Ubuntu system and install it.
sudo apt-get install php7.2-xml php7.2-mbstring php7.2-gd php7.2-mysql php7.2-zip php7.2-imap curl php7.2 curl php-curl php-xml php-mysql php-mbstring php-zip apache2 mysql-server php7.2 libapache2-mod-php7.2 php7.2-cli php7.2-common php7.2-mbstring php7.2-gd php7.2-intl php7.2-xml php7.2-mysql php7.2-zip php7.2-curl
This command leads to the window of MySQL:
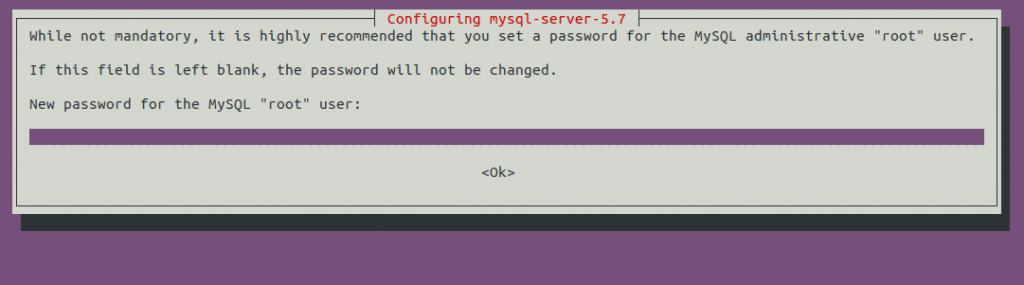
Enter the root new password carefully and hit Enter.
Note: Save all the user IDs and password very carefully.
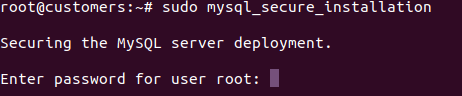
Step 7. Now run command:
sudo mysql_secure_installation
It enables you to improve the security of your database. Enter the password and answer the question to improve security.
Step 8. DB Creation :
Log in to MySQL by the following command and enter the mysql root password and run the following command to create a database for Mailwizz:
mysql > create database mwdb;
mysql > CREATE USER ‘mwuser’@’localhost’ IDENTIFIED BY ‘zzzip12345oop’;
mysql > GRANT ALL PRIVILEGES ON mwdb . * TO ‘mwuser’@’localhost’;
mysql > FLUSH PRIVILEGES;
mysql > exit;

Now your database has been created with following credentials
- Hostname: localhost
- DB Name: mwdb
- User: mwuser
- Password: yourpassword
Step 9. Now run SCP command(secure copy) command to copy file(s) between your system and remote VPS in a secure way. This command is run from your home terminal.
scp /home/codecanyon-EdBgtRs-mailwizz-email-marketing-application.zip [email protected]:/root/
Please use the file name which you have downloaded after Mailwizz license purchase.
Step 10. Now again login to your remote host.
Run ls command to confirm whether your zip file is loaded successfully or not.

Step 11. Install unzip: You can use the unzip or tar command to extract (unzip) the file on Linux or Unix-like operating system. Unzip is a program to unpack, list, test, and compressed (extract) files and it may not be installed by default.
apt-get install unzip

Now transfer the mailwizz.zip file in /var/www/mailwizz folder and unzip the Mailwizz.zip file in the same folder.
You will get a new folder called Mailwizz following by the version like mailwizz-1.8.3
In the new Mailwizz folder you have three folders
1) README.md 2) latest 3) update
Now move all the content of the latest folder to parent directory by the following command:
mv latest/* /var/www/mailwizz
Step 12. Now set up the config file of apache2. For setting up the config file of apache we need to create a file in /etc/apache2
For that create a new file like yourdomain.com.conf in “/etc/apache2”
I created filename “customers.postboxservices.conf”

after that change the following lines with your domain name and your IP address.
<VirtualHost 167.71.XXX.XX(your IP address):80>
ServerAdmin [email protected]
ServerName contacts.yourdomainname.com
ServerAlias www.contacts.yourdomainname.com
DocumentRoot /var/www/mailwizz
ErrorLog /var/www/mailwizz/logs/error.log
CustomLog /var/www/mailwizz/logs/access.log combined
<Directory /var/www/mailwizz>
Options Indexes FollowSymLinks MultiViews
AllowOverride All
Order allow,deny
allow from all
</Directory>
</VirtualHost>
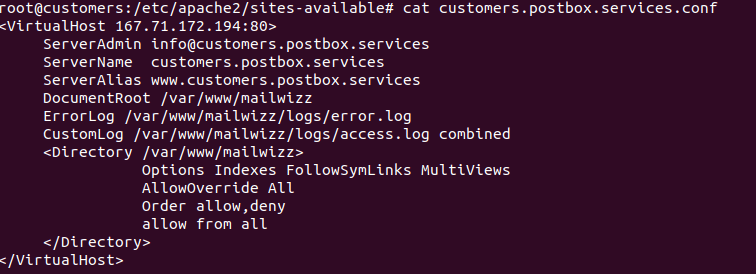
save and exit.
Step 13. Now switch the directory to “~#/etc/sites-enable”. And run a command
ln -s /etc/apache2/sites-available/yourdomainname.com.conf yourdomainname.com.conf
Like

Point your browser to the install directory, i.e : http://www.yourdomain.com/install
Screen 1: Welcome
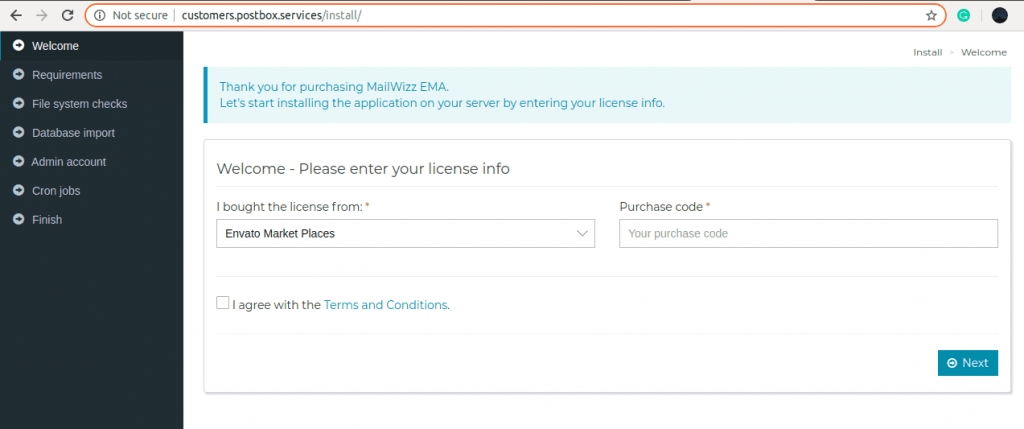
Your Mailwizz is ready to use. Enter the Purchase code that you get from code-canyon after purchasing the Mailwizz. and hit Next.
Screen 2: Requirements
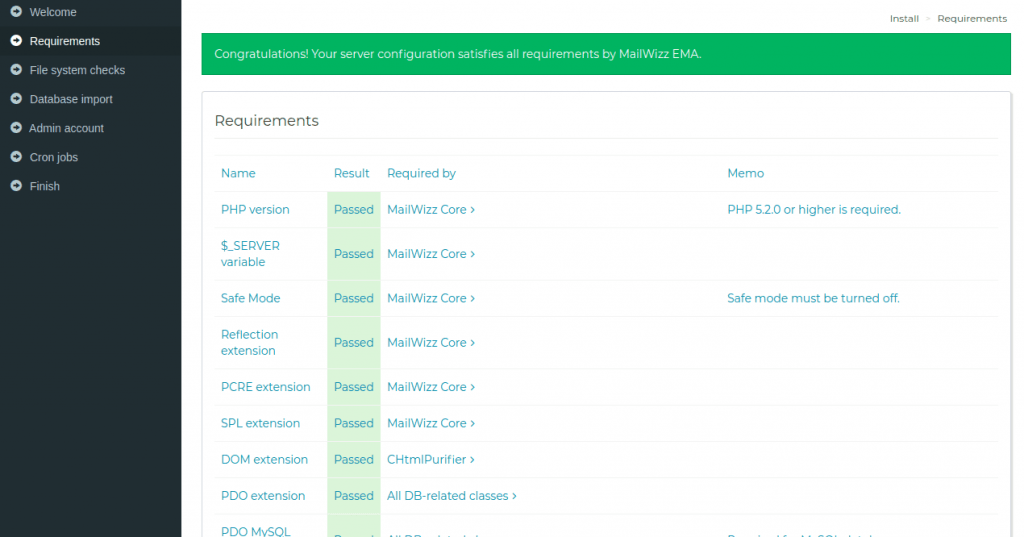
As we have already installed the required PHP extensions it shows passed, hit the next.
Screen3: Database configurations
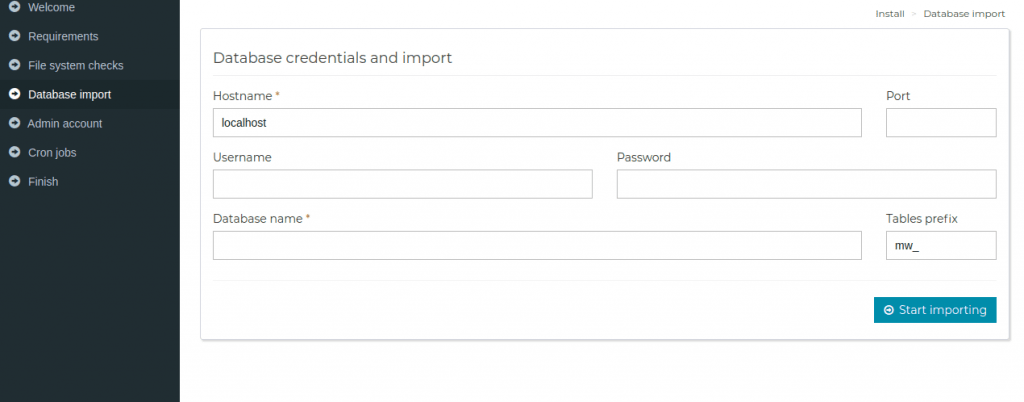
Enter your database details that we created in step 8: Leave the port column blank.
Hostname: localhost
DB Name: mwdb
User: mwuser
Password: yourpassword
After entering the information hit start importing. This led you to the next screen
Screen 4: Admin Account:
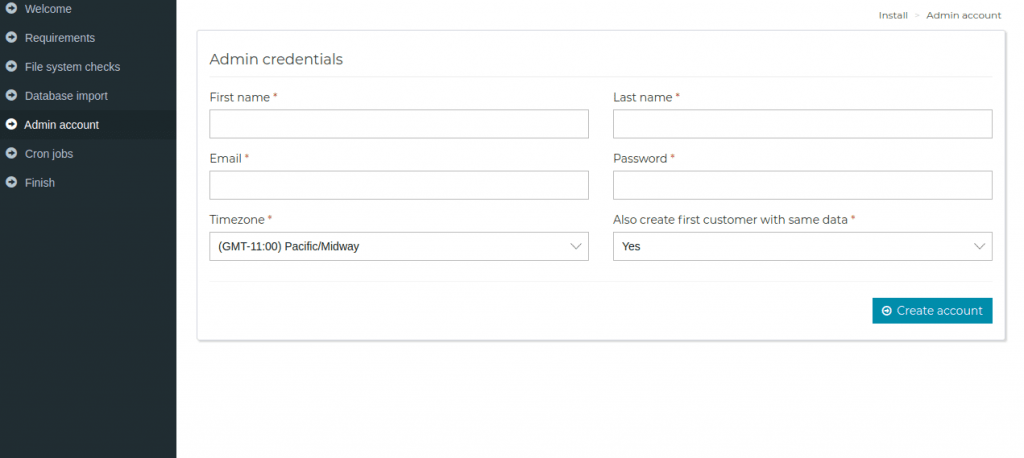
Enter the First name, Last name, a valid email address and password
Save the password carefully as an admin you are only able to login to Mailwizz Backend window.
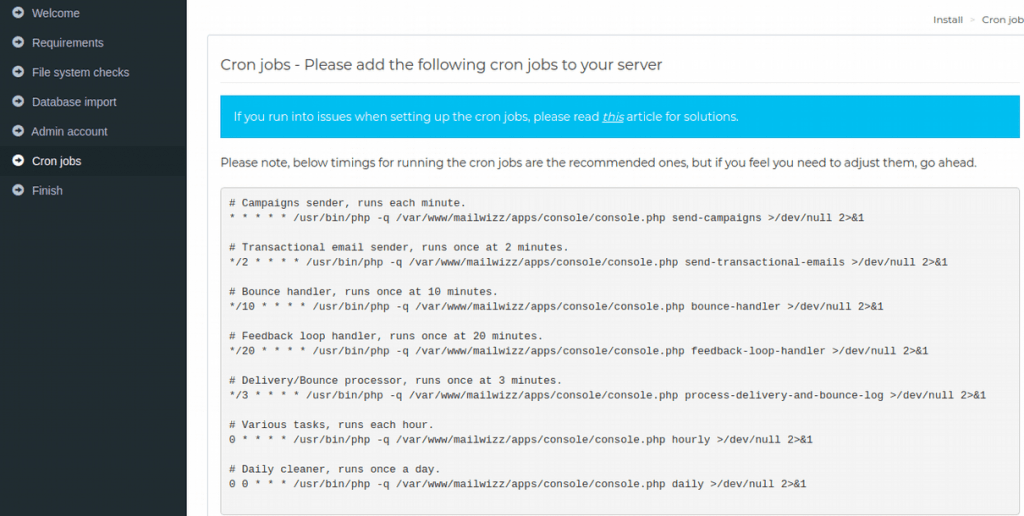
Screen 5: Cron jobs
Mailwizz shows a message to add cron jobs “Cron jobs – Please add the following cron jobs to your server”
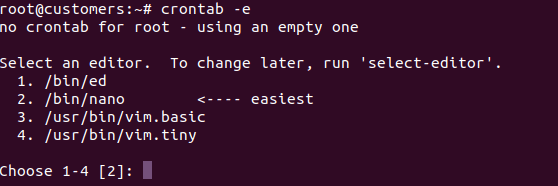
For this on terminal window use command crontab -e( To edit cron jobs). Select option3 to edit cron job in vi editors.
Now copy and paste the cron jobs that are provided by Mailwizz.
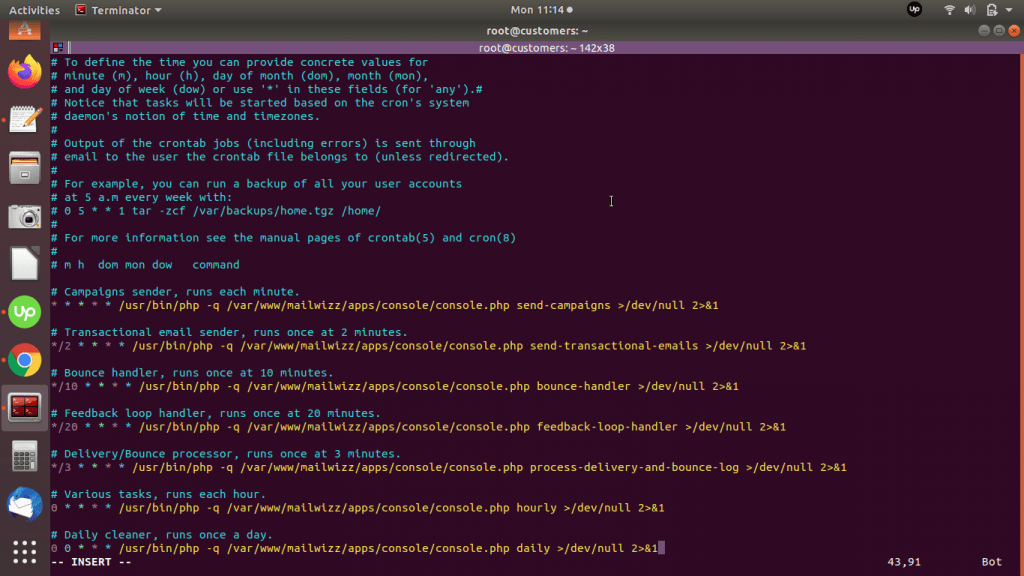
Save and exit from Vi editor. Now cron jobs are installed. Continue on Mailwizz window.
The last thing you need to do is remove the install folder.
The install folder location is: “/var/www/mailwizz/install“
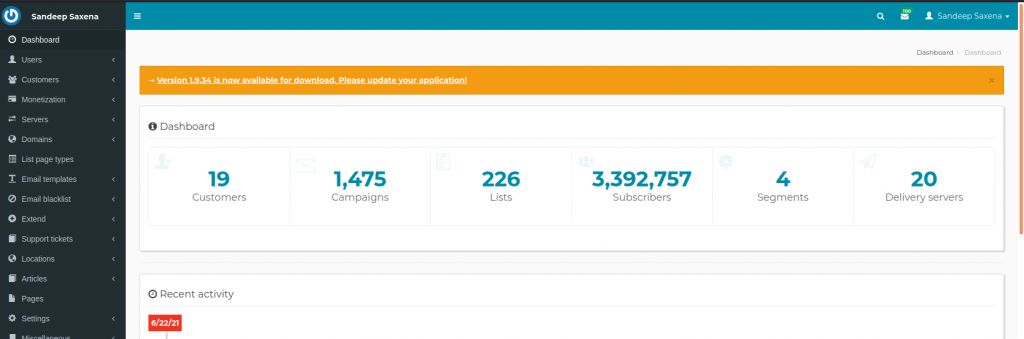
Your Mailwizz is ready to use now. Login to the backend to set up your delivery servers and assign any new users

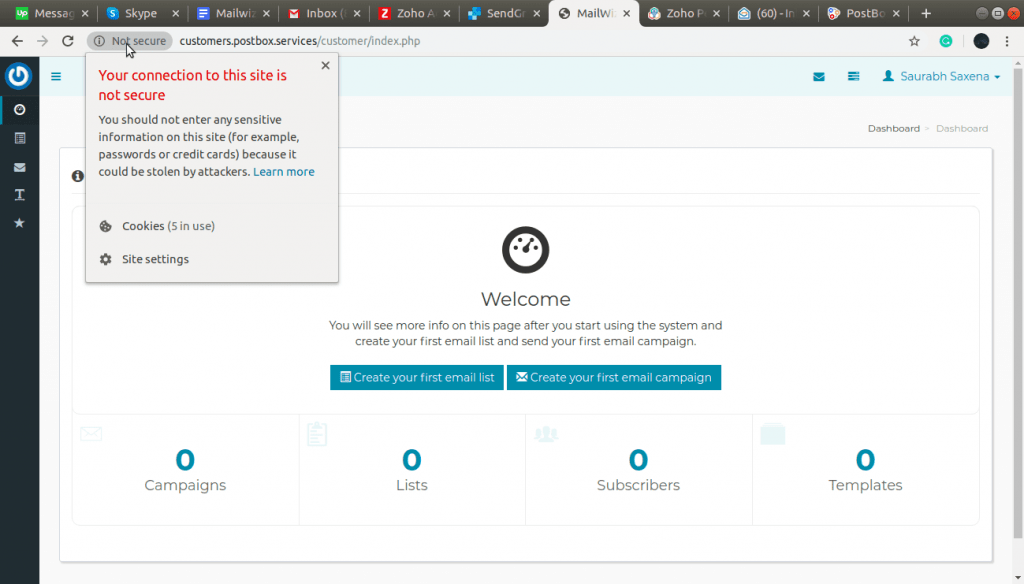
Now your Mailwizz is ready but the indicator shows your sites is not secure to open. This is not good for any email campaign and deliverability. To make your link secure you need to install SSL certificate. For that open the terminal and follow the steps below.
Step 1: First, install Let’s Encrypt client on Ubuntu.
First, add the repository:
sudo add-apt-repository ppa:certbot/certbot
sudo apt install software-properties-common
Install Certbot’s Apache package with apt:
sudo apt install python-certbot-apache
Certbot provides a variety of ways to obtain SSL certificates through plugins.
The Apache plugin will take care of reconfiguring Apache and reloading the config whenever necessary.
To use this plugin, type the following:
sudo certbot –apache -d your_domain -d www.your_domain
Example:
sudo certbot –apache -d customers.postbox.services(your domain)
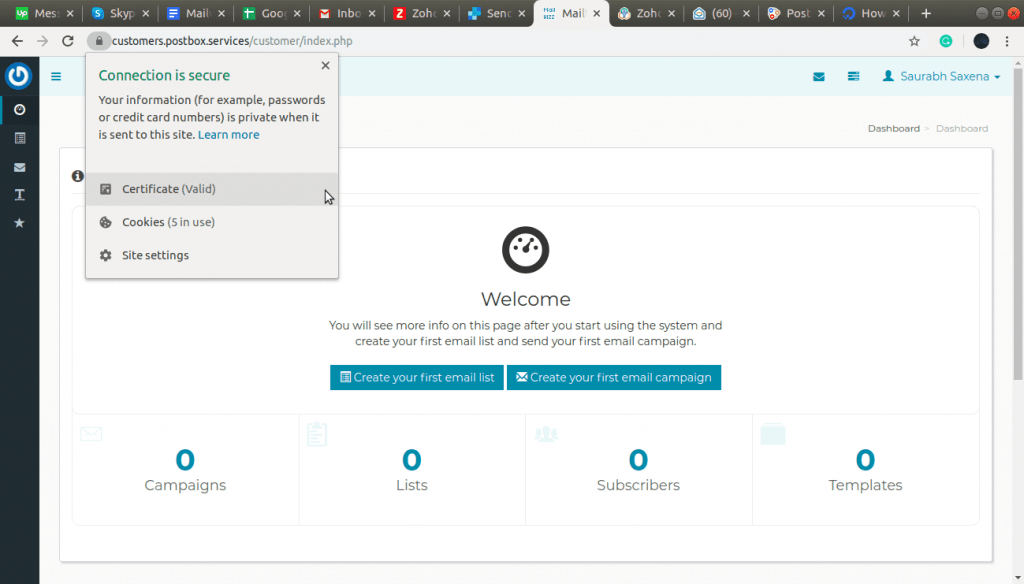
While running this command agree to all the terms when prompted. It will ask if you want to redirect from http to https, always choose redirect. Once certificate is installed you will see that your Mailwizz installation works on https in the browser.
Now your Mailwizz is ready to use add your SMTP server credential and start sending email campaigns.