Mailhog for email test environment
Mailhog Introduction
If you are developing an application which sends out emails you might need a light weight email test server. Off course you can set up a full fledged email server but that will need some hardware, network configurations, mail server setup and DNS changes. With Mailhog you can setup a light weight fake local email server to emulate SMTP service and can be up and running with email testing in minutes
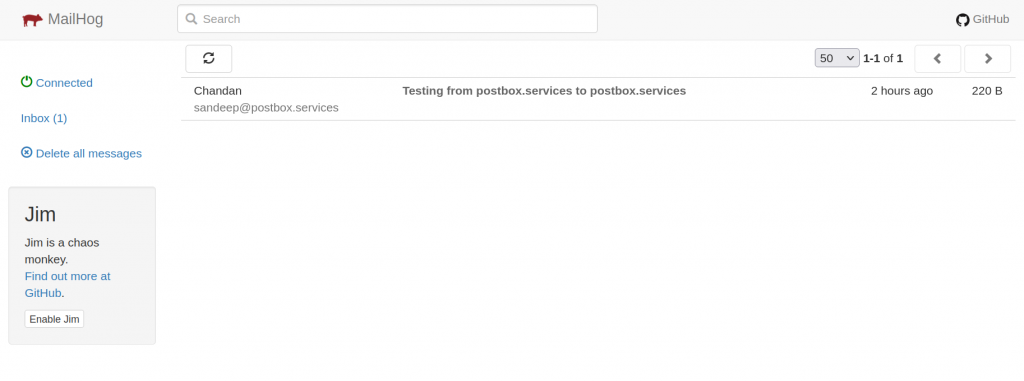
Mailhog Dashboard
What is Mailhog?
Mailhog in an open source email testing tool written in Go programming language which fakes a SMTP server. Mailhog is available for setup on multiple operating systems including Linux, Mac, FreeBSD and Windows.
Mailhog hogs emails sent to it and you can see the emails sent to it on its web dashboard.
Its code is available on Git https://github.com/mailhog/MailHog
What is Mailhog used for?
Mailhog is used to build a quick email test environment during application development. With Mailhog you can send an email from any email address to any other email address within Mailhog.
What are some of Mailhog features?
- Lightweight and portable
- Extended SMTP Support
- Multipart MIME support
- In-memory message storage
- Emails Capture and Storage
- Download individual MIME parts
- Real-time updates using EventSource
Setup Mailhog on Ubuntu 18.04
We are going to setup Mailhog on Ubuntu 18.04 but you can install it on any other operating system mentioned earlier.
We will demonstrate Mailhog setup using Golang package
Download and setup Mailhog on Ubuntu 18.04
Step 1: Hostname and DNS (optional)
Setup proper hostname of your machine because if you plan to release emails to external email servers later a FQDN is required.
Additionally if you want to access Mailhog dashboard on a URL set the DNS to point back to the public IP of the machine you are using to setup Mailhog. In our case we have setup A record mailhog.postbox.services pointing to the public IP of the Ubuntu VPS we are using for this blog.
Step 2: Prerequisites
Install git
sudo apt-get install git
Install golang package
sudo apt-get -y install golang-go
configure path environment variables by adding below entries to your $HOME/.profile
export GOPATH=/root/gocode
export PATH=$PATH:/usr/local/go/bin
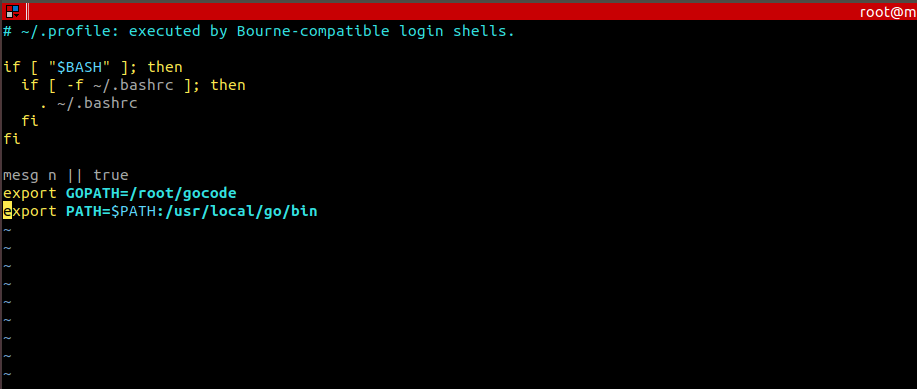
Changes made to a profile file may not apply until the next time you log into your computer. To apply the changes immediately, source your profile again.
# source ~/.profile

Step 3: Install Mailhog
Now you can install Mailhog using command
go get github.com/mailhog/MailHog
sudo cp /root/gocode/bin/MailHog /usr/local/bin/mailhog
Step 4: Setup Mailhog to start automatically on system reboot
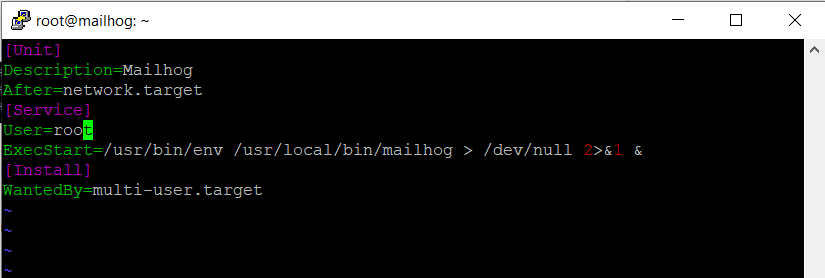
vi /etc/systemd/system/mailhog.service
Paste the below content
[Unit]
Description=Mailhog
After=network.target
[Service]
User=root
ExecStart=/usr/bin/env /usr/local/bin/mailhog > /dev/null 2>&1 &
[Install]
WantedBy=multi-user.target
systemctl daemon-reload
systemctl enable mailhog
Start and check status for mailhog service
systemctl start mailhog
systemctl status mailhog
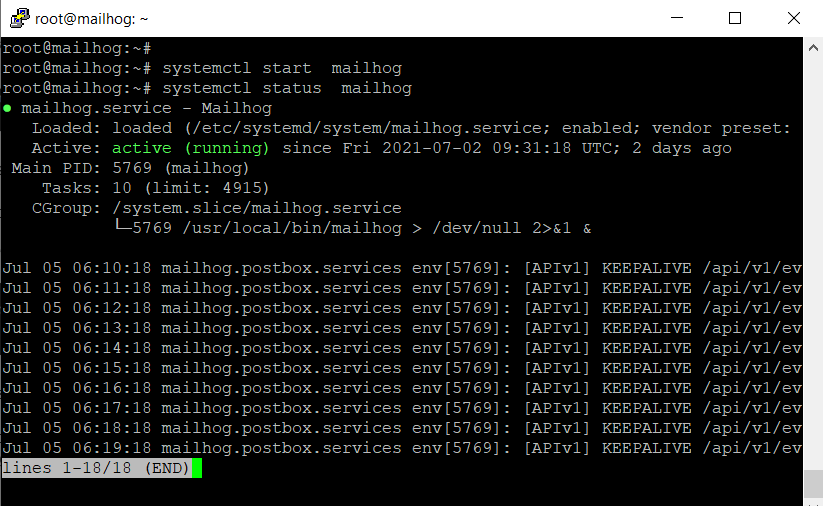
Congratulations MailHog is successfully installed.
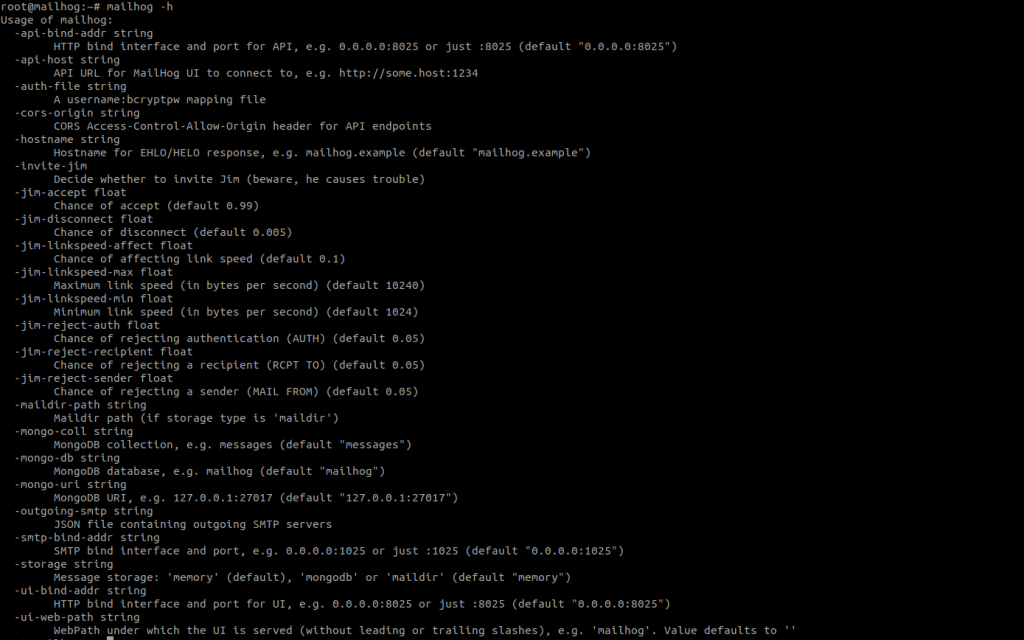
Configuration options for Mailhog
There are lot of options available to configure Mailhog for example you can change default ports or you can change hostname for EHLO/HELO response.
Available options can be checked with command :
mailhog -h
Setup Mhsendmail and configure it with Mailhog to send emails
What is Mhsendmail
Mhsendmail is a sendmail like utility created to send emails via Mailhog. It ensures that your application sends emails using SMTP server listening at localhost:1025 which is handled by Mailhog.
How to install and configure Mhsendmail
Install mhsendmail using Golang:
go get github.com/mailhog/mhsendmail
Now you need to make sure that whatever method you are using to invoke email sending utility that uses mhsendmail.
If you are on Ubuntu change sendmail path
sendmail_path = /usr/local/bin/mhsendmail
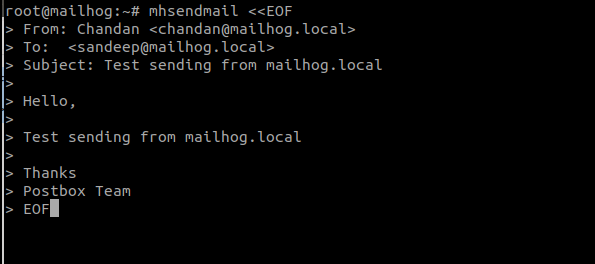
Let’s send email using mhsendmail via mailhog SMTP
For local testing you can send from mailhog.local
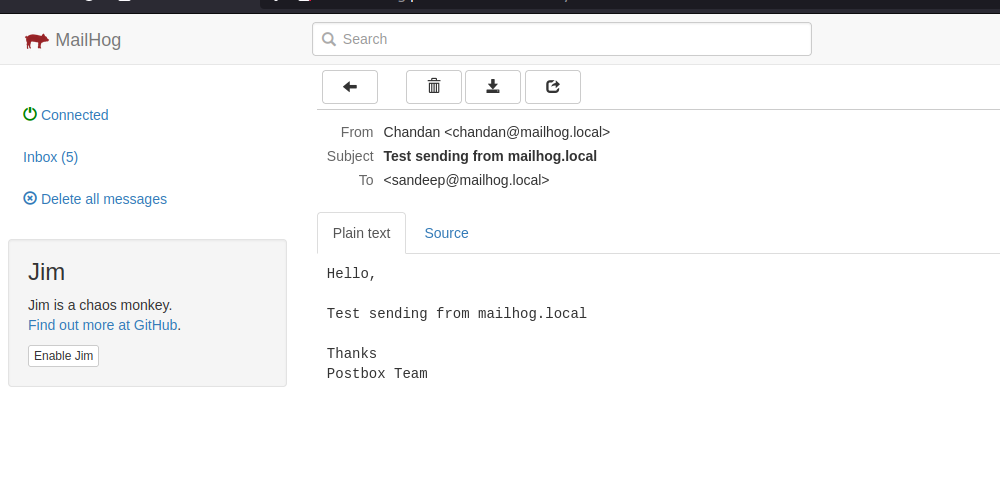
mhsendmail <<EOF
From: Chandan [email protected]
To: [email protected]
Subject: Test sending from mailhog.lo
Hello,
Test sending from mailhog.local
Thanks
Postbox Team
Once sent you can check the email in mailhog web dashboard
Release email from mailhog to custom SMTP for further delivery
If you need a workflow where your application sends emails to Mailhog for testing, and after testing you want to release emails to external email addresses for final testing that can also be done. For that the receiver’s email should be the actual email address where email need to be sent:
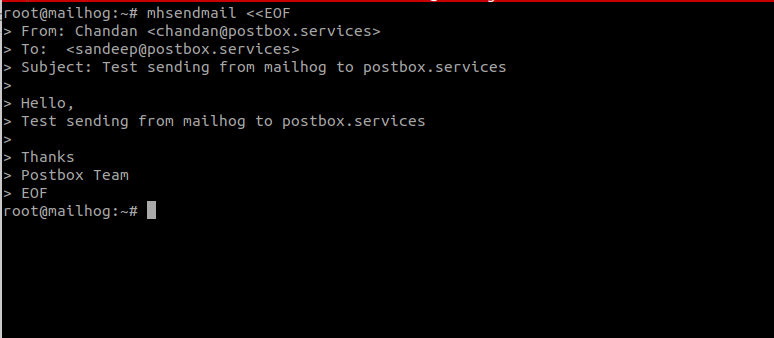
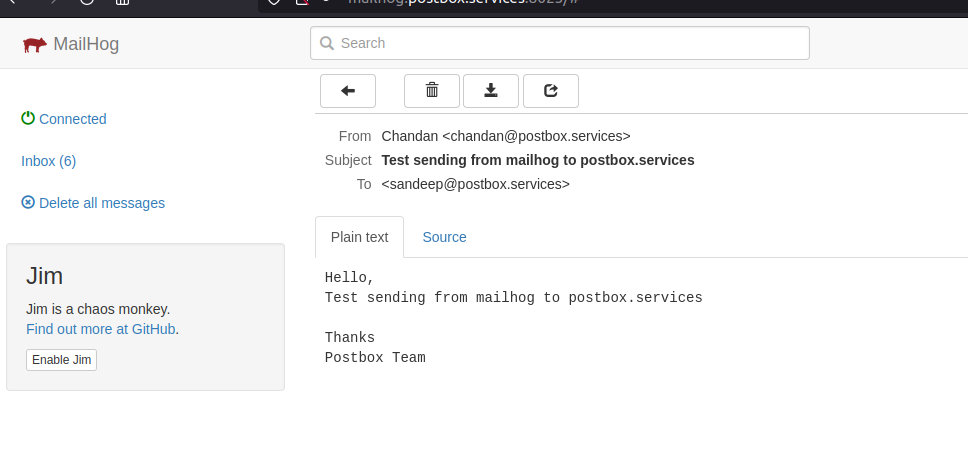
mhsendmail <<EOF
From: Chandan [email protected]
To: [email protected]
Subject: Test sending from mailhog to postbox.services
Hello,
Test sending from mailhog to postbox.services
Thanks
Postbox Team
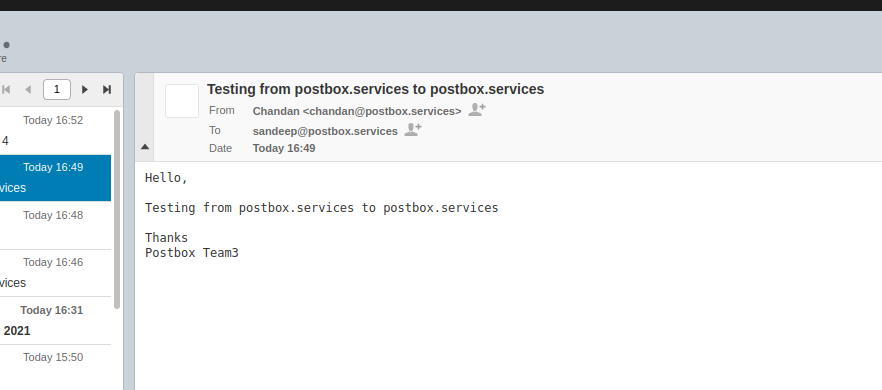
You will see the email sent is captured by Mailhog
Once you have tested the email you can release it to email address to which it was sent. You will need to click the release button on top of the email
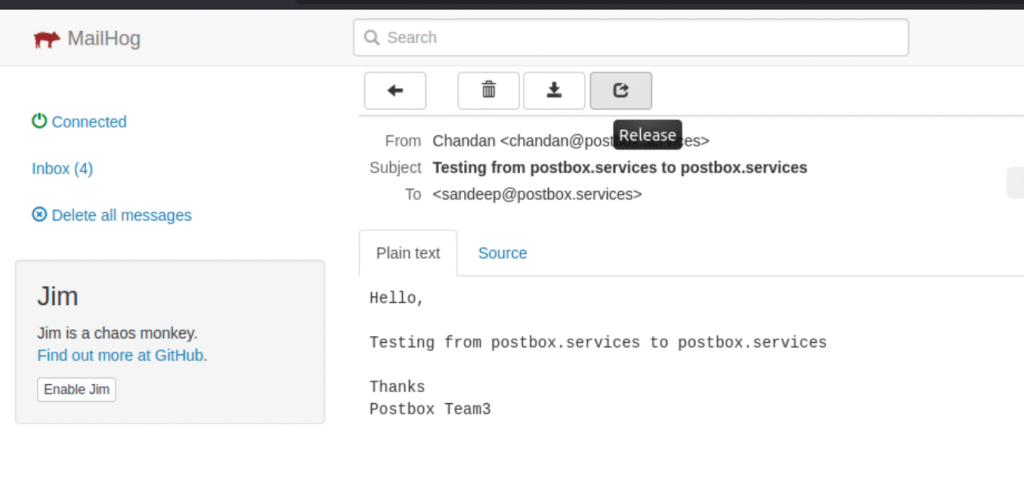
On next pop up screen it will ask for a SMTP server settings which you want to use to send the email. Fill in the details and click release message.

Once email is successfully released you will see the email on original email address to which it was sent.
Issue (release message does nothing):
To send external emails please make sure that the hostname used by mailhog in EHLO/HELO does not point to localhost but to a fully qualified hostname. Unfortunately mailhog does not show any error on web UI if the email is not successfully released so you will need to check the logs for the issues.
How to send emails to Mailhog from other systems/servers
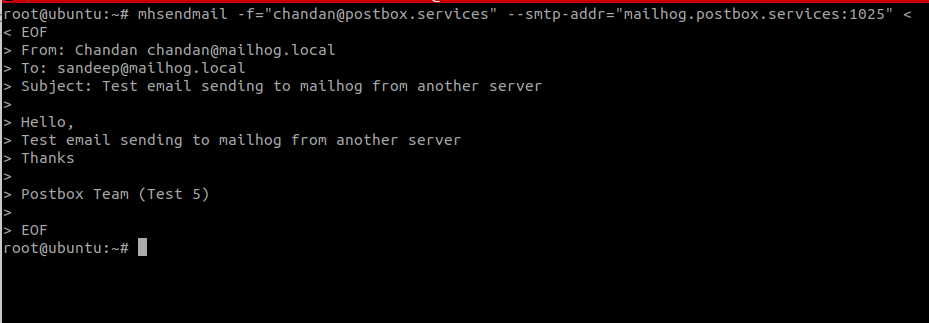
In case you need to send email from other servers/systems to mailhog that can also be done. First you will need to install mhsendmail on those other systems using the commands mentioned earlier. Then execute the mhsendmail and pass the mailhog system’s IP address as shown below:
mhsendmail -f=”[email protected]” –smtp-addr=”xx.xx.xx.xx:1025″ << EOF
From: Chandan [email protected]
To: [email protected]
Subject: Test email sending to mailhog from another server
Hello,
Test email sending to mailhog from another server
Thanks
Postbox Team (Test 4)
Or if you have configured your DNS with A record of the system you can even use that. In our case we have configured mailhog.postbox.services as an A record.
Now you can configure any system, application or script to send emails to Mailhog and you don’t necessarily need to use mhsendmail for that. Any application can pass the email to Mailhog on the SMTP port on which it is running which by default is 1025.
Hope this blog helps you to understand how to setup an email test environment using Mailhog. For any questions/queries please don’t hesitate to reach out to us.